Saturday, September 28, 2013

Car Flipping

Michael bought a whirly jig and left it at my house while he's working on his garage. After taking the unit apart to fix it, I finally got it working enough to attempt to hook it up to my car. My trusty Henrob gas welder and some one inch square metal tubing allow me to make a bracket to bolt the car to the twirly jig.

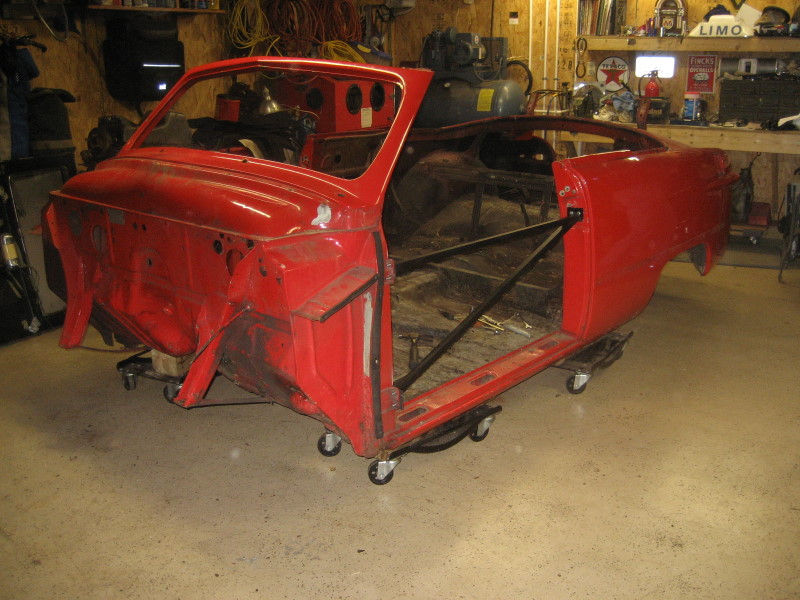
Getting the hydrolic rams fixed were the easy part, the telescoping tubes were a real pain but, I got them working. Now, I had to find somewhere to put all the "stuff" that I had been storing inside the body of the car. The time is getting close to flip it and I'm nervous.

First shot to make sure I have all my clearances right and it won't hit the lower cross bar. Also to make sure my brackets hold too.


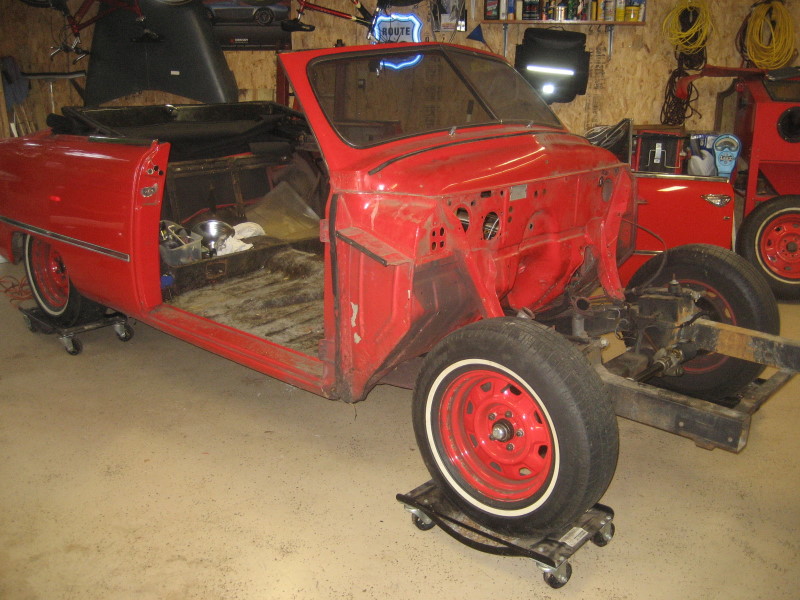
So far, so good. It twirls really easy too.
After scraping off a lot of the under coating, I see I'm going to need a lot more work than I had anticipated. Nothing huge but just little patches. Actually, the stock holes in the firewall are more work but I want this to be perfect so I'll scrape it all to the bone and make sure any holes or rusted areas are patched with metal.

This Henrob gas welder is really great!

Sunday, April 14, 2013

April has arrived with warm weather. After the Spring AutoFair and too many episodes of "Overhaulin", I've gotten fired up about working on my ride again. I cleaned the power rack yesterday and painted it. Today, I mounted it only to see the threaded arms are going to be too long so I'm going to have to cut them down and rethread them. Regardless, it's a step in the right direction.

I still need to find someone who can set up a rear end to get the 3:55 gears I need for my 8". And, to beg able to sift thru the hype about whose gears are the best. I just want quite, not a noisy rear.

I'm going to go up online now to see what kind of research I can do to find the right gears.

Sunday, July 15, 2012


The springs are painted and ready to go in .What a pain in the butt they turned out getting into the A Frames. Now they're in and I want to try and dry fit the engine block and tranny in so I can make a tranny mount.


The Jarden headers are a little close to the drivers side motor mount so I'm going to have to make a slim head on the bolt that goes thru the frame mount. I've now made the tranny mount and just have to paint it. I've marked the spot on the frame web where I need to drill bolt holes for the tranny mount, I'll drill these after I take the block and tranny back out.

The rear springs and housing are mounted. I have to order my 3.55 gears next week. I'm not sure that I'm going to tackle putting the ring and pinion into the carrier, I don't have the run out guage for that. 

The rear axels are shown in place, I have to put in the differential before I drive them in to place seating the axel bearings. I did this just to be able to put the tire and rims on so I could set it on the floor.

Since I got my new Henrob welder, I've decided to play with welding up the body seams while I wait on my ring and pinion gears to get here. I rotated the body so that when I use the grinder, I can just sweep all the crap out the door instead of the whole garage floor.

After taking the seam cap off, I've started welding up the gap. Found some of the original led in the body where they filled in a dent on top that they must have made at the factory. This isn't as easy as it looks.

Sunday, June 03, 2012

After the frame came out from under the car, I had to strip everything off of it to start sand blasting it down to raw metal. A tedious time consuming job, did I say nasty too?

Well, I made a rolling frame to set it on and took it  out into the driveway to start blasting it. After two bags of sand, I realized that it was going to take forever so I stopped and went to plan B.


At this point, I'm done with trying to blast this puppy. I loaded it up onto the trailer and took it to a commercial blaster.


$180 bucks later, it came back pristine! I ordered two quarts of Eastwoods Chassis Black and started brushing this. Turning it over wasn't an easy feat either. Two of us picked it up the first time and turned it but the next time, I enlisted my neighbors to help. Made a huge difference! ....and my back was thankful too.

The rear end had to be disassembled, cleaned of any oil and blasted also. This goes the same for the backing plates and spindles.

Ahhhhh....it's coming together. The Eastwoods is stretching out to paint everything.


Got the Moog K772 ball joints in on Friday and started bringing this Phoenix out of the ground! Leaf springs have been blasted and painted and are drying now. Going to dry fit the axles so I can mount the housing and put wheels on the frame to lower it back onto the ground. I want to dry fit the block and new World Class 5 speed to see what I have to do for a tranny moun.


Sunday, November 06, 2011

Sandblasting Has Arrived!
After finely getting some sand and figuring out what was wrong my by blaster (clogged), I've gotten on track again to get to workin' on this frame. 60 years of surface rust and a lot of grease and oil has caked itself onto my frame and needs to come off so I can paint it. Even if nobody will ever see it, I'll know it's painted.

Just Starting Out...yuck.


One side has been ground to take off the bulk of "stuff" so I naturally started on the worst side to see how long this was going to take. Conclusion...a while. Two bags of silica sand for one half of one rail. It's going to be a week long job.

When I get it completed, it has to be turned over and worked on the bottom side and then try and get what I can on the inside. But, it will be worth it when I'm done.


So, I took some old exhibit piping with casters and made a new body roll around to make the body easier to work on. This will put it up at a more workable height for welding the holes in the firewall. The pipe on this unit is extremely thick and was a bear to cut but I have a ton of extra pieces to allow me to add wings to the pipe to stabilize the body. And, the swivel casters will make it easy to move around the garage as I need to.


Monday, March 21, 2011

Well, the body is coming down nicely. I've completely taken everything off of the main body and have it off the frame. Next step is to build a body roller so I can rotate it to get to the bottom. It seems to have only one small area in the trunk that I need to patch but I still want to completely strip it and make sure.


Once I have the holes in the firewall welded up then I want to look for a media stripper to take it to. I'm going to take all the body parts to have them stripped down to the bare metal to make sure I have this puppy solid!


The frame is going to be a challenge, I want to get rid of 60 years of grease and surface rust to be able to paint it. I'm not going to make this a show frame, ala "Garage Potato" but an extremely clean driver. I want to make sure the drive train fits without the "X" member being in the way for any of the linkage or exhaust system. My pressure washer got rid of some of the grime but not enough, I'm going to have to do this manually with a grinder and wire brush then get out the sand blaster for the small crevices.

Sunday, May 23, 2010

Finally, after a three peat of set backs, we gain success in the fact that we've finally fired off the engine in  success!
The engine just before one of our three leaks. How depressing it was to fill the engine three times with water at various levels to only see leaks due to problems.

Back to the '51!

Now that the truck is up and running, it's back to the '51. Spent the afternoon in the sweltering heat in the garage taking it apart. I went to August on Saturday to take parts to Paul Felberg and to go over to look at the car that's going to be the donor for the engine and other small parts. It's an '87 Mercury Grand Marquis and it's loaded.  It has a roller cam and all the goodies!


Next, to finish disassembling the car to get the body off the frame to start with the basics by cleaning and painting. I'm learning a lot about this car by simply taking it apart.
With all the parts mounting up, I have to take some over to my daughters house to be able to move around. That is a luxury!